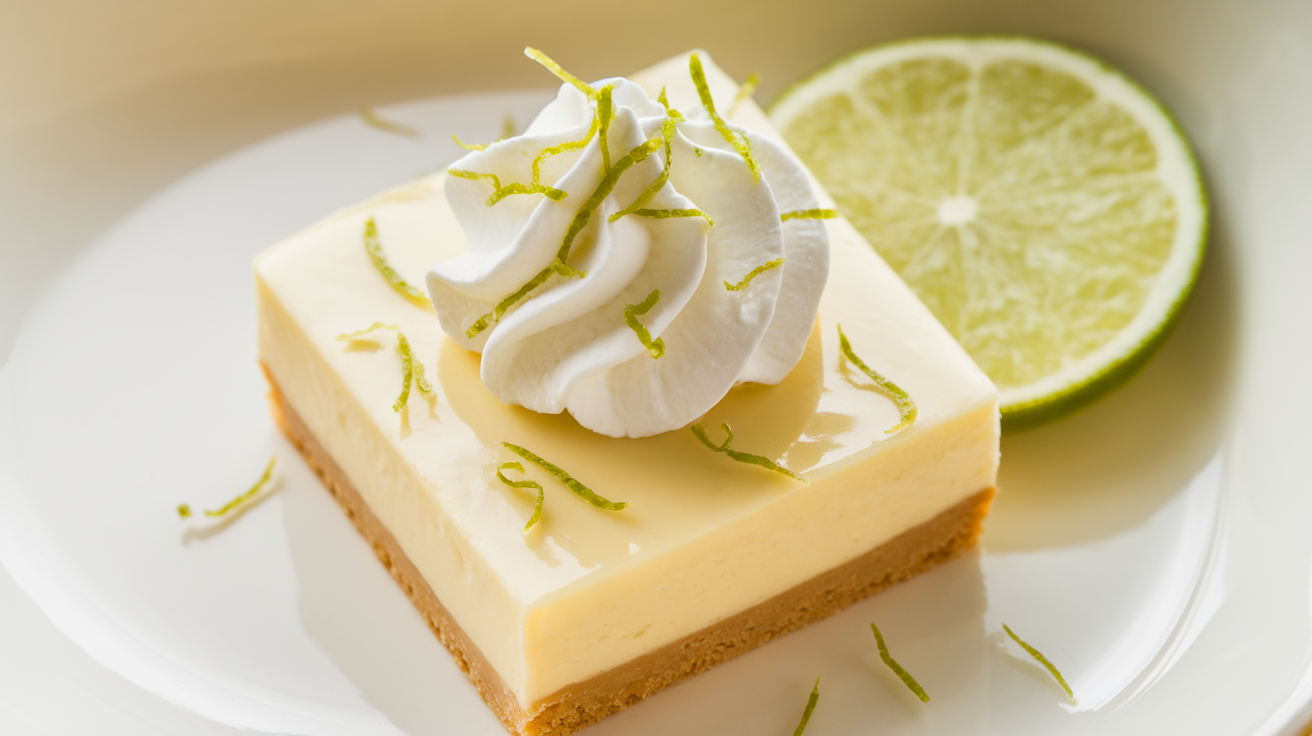
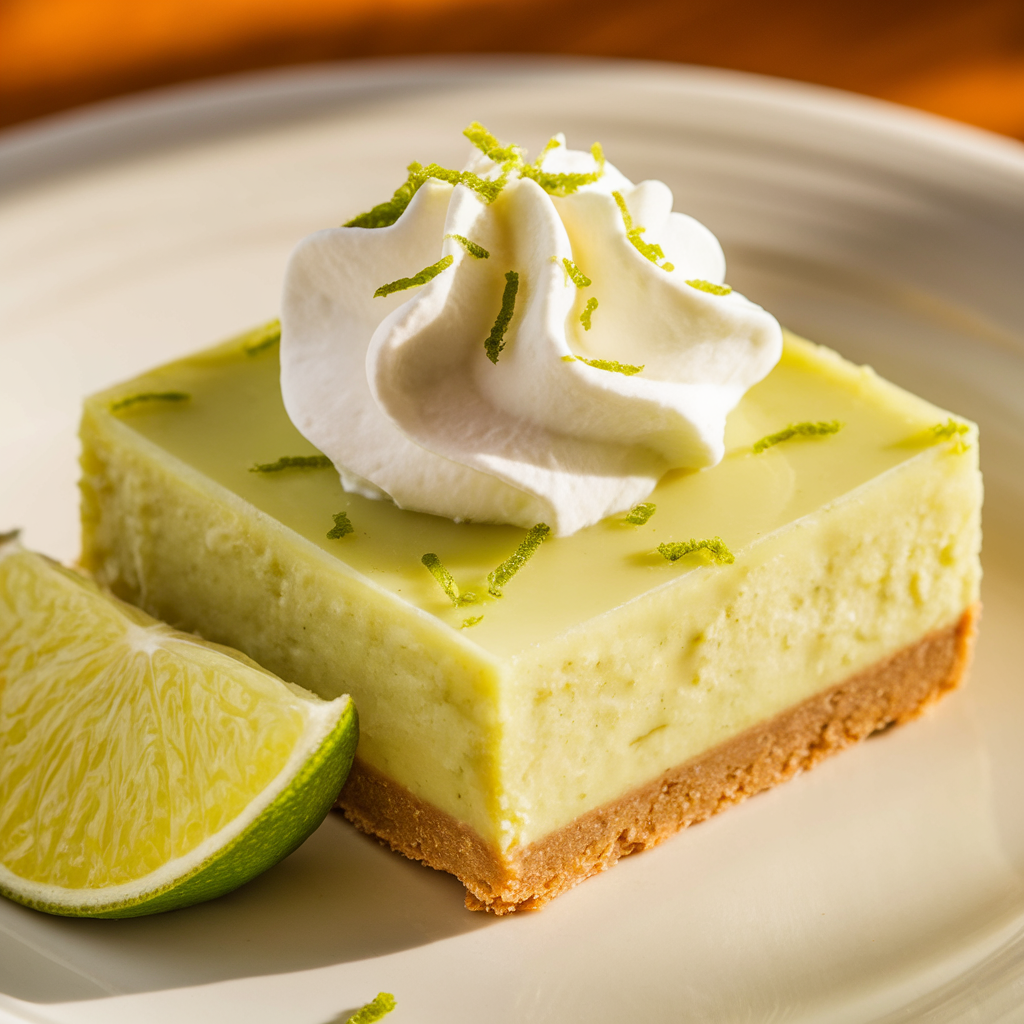
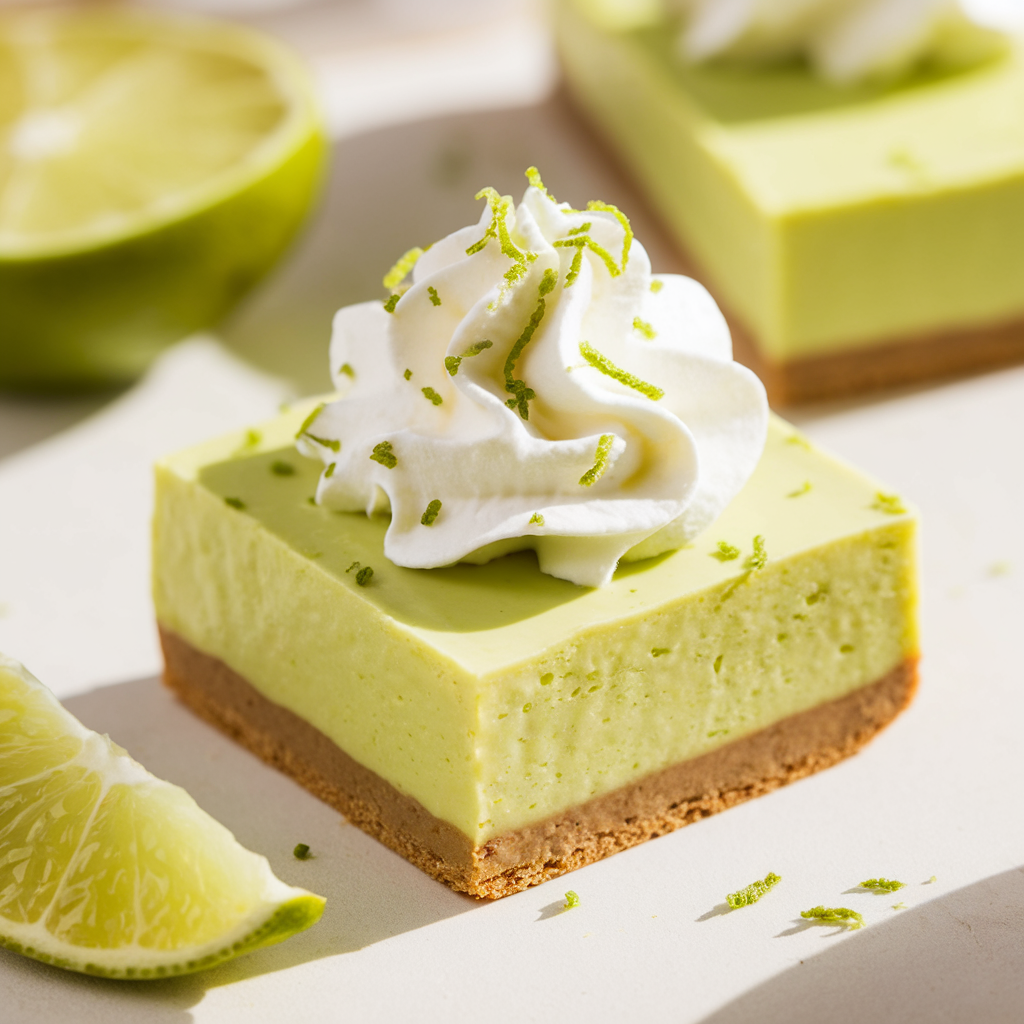
Summer baking brings out the best in us as we seek refreshing, light, and flavorful treats to beat the heat. Among the most beloved summer desserts are Key Lime Pie Bars—an irresistible fusion of tart lime, sweetened condensed milk, and buttery graham cracker crust. These creamy Key Lime Pie Bars offer a delicious, tangy experience that is perfect for any occasion, from summer barbecues to family gatherings.
In this recipe, we’re not just sticking to the classic. We’re adding a delightful twist with brown butter, giving the crust a deeper, nutty flavor. Whether you’re looking for a new twist on traditional Key Lime Recipes or a fun summer treat, these Key Lime Pie Bars will be sure to impress. Let’s dive into the key ingredients, the simple steps, and how to make the most out of this lime-infused dessert.
Why You’ll Love Creamy Key Lime Pie Bars
Key Lime Pie is a timeless dessert known for its smooth filling and crunchy crust. While the traditional pie has long been a favorite, these Key Lime Pie Bars are perfect for individuals who love an easy-to-serve dessert that’s perfect for parties and gatherings. The bars maintain the smooth, creamy texture of the pie while being easy to cut and serve.
These Key Lime Pie Bars are also ideal for those who enjoy a citrusy burst in their sweets. The tartness of the lime filling combined with the sweetness of the graham cracker crust balances perfectly. Not only do they taste amazing, but the bars are visually stunning too, with their vibrant green lime filling and beautiful golden crust.
Another key aspect of this recipe is the use of browned butter in the crust. This small but powerful addition enhances the flavor of the graham crackers, giving the crust a rich, nutty depth that elevates the entire dessert. It’s a small change, but one that adds so much to the overall taste experience.
Now, let’s talk about the ingredients and how to make these irresistible Key Lime Pie Bars!
Ingredients for Key Lime Pie Bars
For the Brown Butter Crust:
- 1 ½ cups graham cracker crumbs
- 1/3 cup sugar
- 1/2 teaspoon salt
- 6 tablespoons unsalted butter (for browning)
For the Key Lime Filling:
- 2 large eggs
- 1 (14-ounce) can sweetened condensed milk
- 1/2 cup fresh lime juice (about 4-5 limes)
- Zest from 2 limes
For the Topping:
- Whipped cream (optional, for garnish)
How to Make Creamy Key Lime Pie Bars
Step 1: Prepare the Brown Butter Crust
The first step to making these delicious Key Lime Pie Bars is preparing the crust. In a medium saucepan, melt the butter over medium heat. Once it melts, allow the butter to continue cooking, swirling the pan occasionally. The butter will begin to foam, and after a few minutes, it will turn a golden brown color and develop a nutty aroma. This is when the magic of brown butter happens, adding a deeper, richer flavor to the crust.
Once the butter has browned, remove the pan from the heat and let it cool for a minute or two. In a separate bowl, mix the graham cracker crumbs, sugar, and salt. Add the browned butter to this mixture and stir until everything is combined. The browned butter will give the graham cracker crumbs a deliciously toasted, nutty flavor that will serve as the perfect base for the tangy lime filling.
Press the crust mixture into the bottom of a lined 8×8-inch baking dish, making sure it’s evenly spread and firmly packed. Bake the crust in a preheated oven at 350°F (175°C) for about 8-10 minutes or until golden brown. After baking, remove the crust from the oven and let it cool slightly.
Step 2: Prepare the Key Lime Filling
While the crust is cooling, it’s time to prepare the creamy lime filling. In a mixing bowl, whisk the eggs and sweetened condensed milk until the mixture is smooth and creamy. Add the fresh lime juice and lime zest to the bowl, continuing to whisk until everything is well combined. The lime juice adds the perfect amount of tartness, while the sweetened condensed milk gives the filling its rich, creamy consistency.
Once the filling is ready, pour it evenly over the cooled graham cracker crust. Use a spatula to spread it out and ensure it covers the entire surface.
Step 3: Bake the Key Lime Pie Bars
Place the baking dish back in the oven and bake at 350°F (175°C) for 15-18 minutes. The filling should set around the edges, but the center may still jiggle slightly when shaken. This is the perfect time to remove them from the oven. Don’t worry if the center seems a bit soft—it will firm up as the bars cool down.
Allow the bars to cool at room temperature for about 30 minutes, then place them in the refrigerator for at least 2 hours, or until fully chilled and set.
Step 4: Serve and Garnish
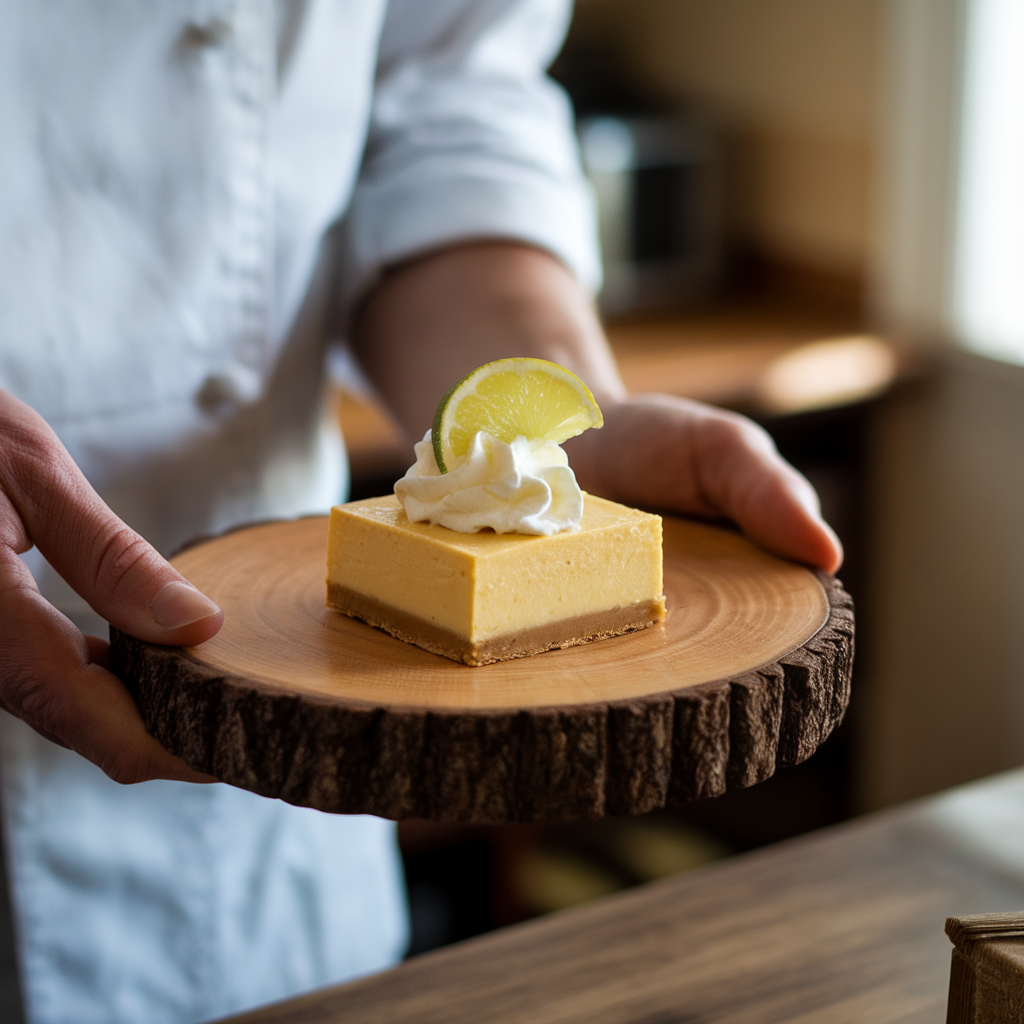
Once your Key Lime Pie Bars are fully chilled, it’s time to cut them into squares. You can garnish them with a dollop of whipped cream on top for an added touch of sweetness and creaminess. For a festive touch, feel free to add additional lime zest or a slice of lime on top for decoration.
These creamy Key Lime Pie Bars are a perfect dessert for any occasion. Whether you’re serving them at a summer barbecue or preparing them for a special family gathering, they’ll be a hit every time.
Tips for Perfect Key Lime Pie Bars
- Use Fresh Limes: For the best flavor, always use fresh lime juice and zest. The zest adds extra citrusy depth, and fresh lime juice has a brighter flavor than bottled lime juice.
- Don’t Overbake: The filling should still be slightly jiggly in the center when you remove it from the oven. Overbaking can cause the filling to crack and lose its smooth texture.
- Chill Thoroughly: After baking, allow the bars to cool completely at room temperature before refrigerating them. They must be fully chilled to set properly.
- Make Ahead: These Key Lime Pie Bars can be made ahead of time and stored in the refrigerator for up to 3 days. They’re perfect for preparing in advance for a busy day or event.
Key Lime Desserts and Variations
If you’re a fan of lime desserts, you’ll love these other variations and ideas to incorporate the bright and zesty flavor into your baking repertoire.
- Lime Meringue Pie: A classic alternative to the Key Lime Pie, the Lime Meringue Pie features a tangy lime filling topped with a fluffy, toasted meringue.
- Lime Cheesecake: If you love creamy cheesecake, try adding lime juice and zest into the filling for a citrusy twist on the traditional dessert.
- Key Lime Cupcakes: These bite-sized treats are perfect for individual servings. Use the same filling as Key Lime Pie Bars and pipe it onto baked cupcakes for a fun, portable dessert.
Why These Key Lime Pie Bars Are Perfect for Summer Baking
Summer is the perfect time for desserts that are cool, refreshing, and full of bright flavors. These Key Lime Pie Bars offer a creamy, citrus-packed experience that balances the sweetness of the graham cracker crust with the tangy, zesty lime filling. Not only are they delicious, but they’re also incredibly easy to make and serve, making them a perfect choice for any summer occasion.
The addition of brown butter in the crust takes the traditional recipe to a new level, giving these bars a rich, nutty flavor that complements the tart lime filling perfectly. If you’re looking for a dessert that can be prepared ahead of time and served chilled, these Key Lime Pie Bars are the perfect option for all your summer gatherings.
Whether you’re preparing a batch for a BBQ or just craving a fresh lime treat, this dessert is sure to become a staple in your summer baking rotation.
Conclusion
Key Lime Pie Bars are the perfect combination of creamy, tart, and sweet. With the addition of brown butter in the crust, these bars offer an elevated take on the classic Key Lime Pie recipe. They’re a fantastic way to bring the refreshing flavors of lime to your next gathering and are sure to be a hit with friends and family. Whether you’re a lover of lime desserts or looking to try something new, these bars will quickly become one of your favorite lime recipes.
This dessert is the ultimate way to celebrate the season, combining summer baking with the bright flavors of lime. So, if you’re ready for a delightful treat, grab some limes, prepare the ingredients, and get baking!