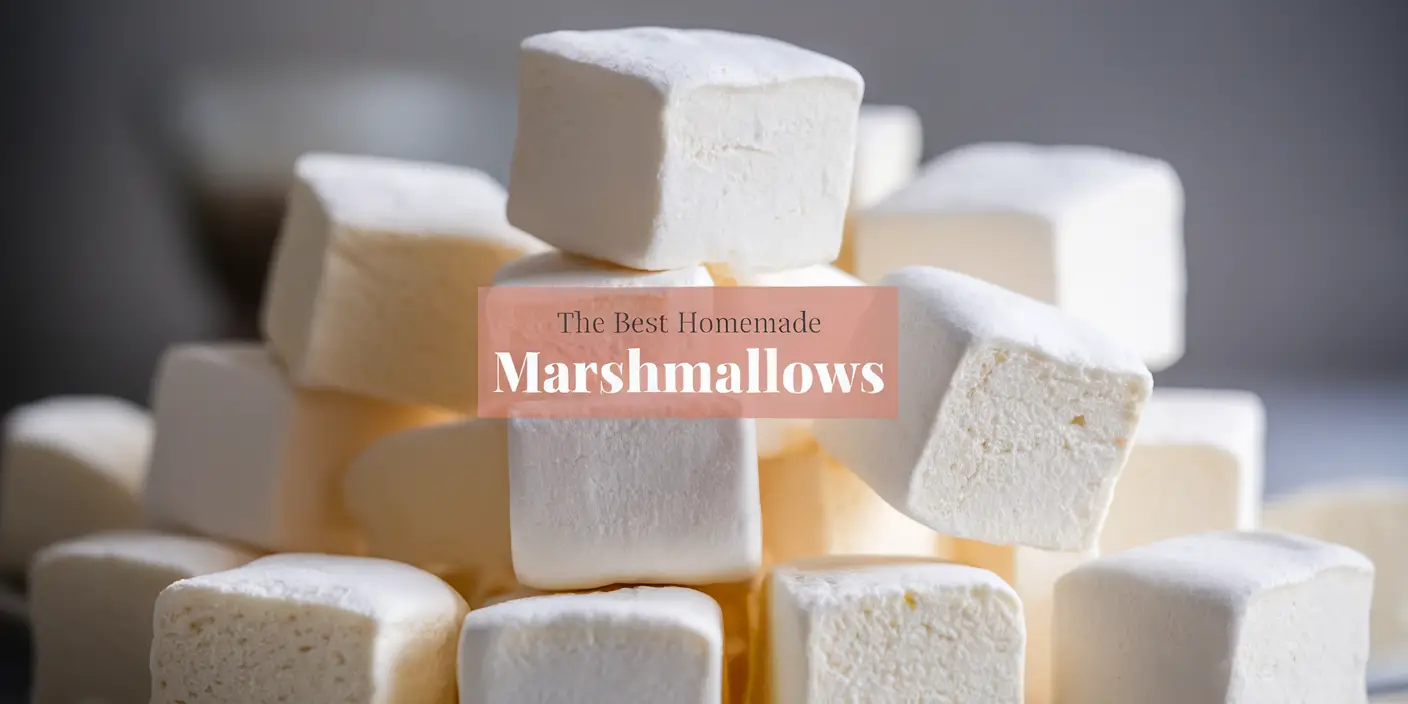
There’s something magical about biting into a soft, fluffy marshmallow that’s been made right in your own kitchen. Homemade marshmallows are not only tastier than their store-bought counterparts but are also free from artificial additives and preservatives. Whether you’re looking to make a treat for your kids, a batch of paleo marshmallows, or a unique addition to your collection of school desserts, this recipe will become one of your dessert favorites.
Let’s dive into this homemade marshmallow recipe that’s surprisingly easy and a fun project for anyone who loves experimenting in the kitchen.
Why Make Homemade Marshmallows?
- Healthier Options: By controlling the ingredients, you can create marshmallows that fit into specific diets, like paleo or gluten-free, ensuring they’re healthy marshmallows.
- Flavor Customization: Add natural flavor extracts or food coloring to suit your taste and aesthetic.
- Fun Activity: This is a great family-friendly project that kids will enjoy helping with.
- Perfect for Recipes: Homemade marshmallows can elevate desserts like chocolate-covered banana bites, chocolate avocado brownies, or even add a special touch to blueberry crumble bars.
Ingredients You’ll Need
For the Marshmallows:
- 1 cup cold water (divided)
- 3 tablespoons unflavored gelatin
- 2 cups granulated sugar (or a paleo-friendly sweetener like maple syrup or honey)
- 1 cup light corn syrup (or substitute with agave syrup for paleo marshmallows)
- 1/4 teaspoon salt
- 1 tablespoon vanilla extract (or other flavor extracts of your choice)
For Dusting:
- 1/2 cup powdered sugar
- 1/2 cup cornstarch (or arrowroot powder for paleo-friendly marshmallows)
Step-by-Step Directions
Step 1: Prepare the Pan
- Grease a 9×13-inch baking pan with a thin layer of oil or line it with parchment paper.
- Mix the powdered sugar and cornstarch in a small bowl. Sift a generous amount over the pan to coat it completely. Set aside.
Step 2: Bloom the Gelatin
- In the bowl of a stand mixer, add 1/2 cup of cold water.
- Sprinkle the gelatin over the water and let it sit for 5-10 minutes. This process is called “blooming” and ensures the gelatin dissolves evenly.
Step 3: Make the Syrup
- In a medium saucepan, combine the sugar, corn syrup, salt, and the remaining 1/2 cup of cold water.
- Heat over medium-high heat, stirring until the sugar dissolves. Stop stirring once the mixture starts to boil.
- Attach a candy thermometer to the saucepan and continue boiling the syrup until it reaches 240°F (soft-ball stage). This step is crucial for achieving the right marshmallow texture.
Step 4: Whip the Marshmallow Base
- Turn the stand mixer on low speed and slowly pour the hot syrup into the bloomed gelatin. Be cautious, as the syrup is extremely hot.
- Gradually increase the mixer speed to high and beat for 8-10 minutes, or until the mixture becomes thick, fluffy, and lukewarm.
- Add the vanilla extract (or other flavors) in the last minute of whipping.
Step 5: Transfer to the Pan
- Quickly pour the marshmallow mixture into the prepared pan. Use a greased spatula to spread it evenly.
- Dust the top with the powdered sugar and cornstarch mixture.
- Let the marshmallows set at room temperature for 4-6 hours, or overnight for best results.
Step 6: Cut and Coat
- Once set, turn the marshmallows out onto a cutting board.
- Use a sharp knife or pizza cutter dusted with powdered sugar to cut them into squares or desired shapes.
- Toss each marshmallow piece in the powdered sugar mixture to coat all sides and prevent sticking.
Tips for Perfect Marshmallows
- Use a Candy Thermometer: Precision is key when making marshmallows. A candy thermometer ensures your syrup reaches the perfect temperature.
- Room Temperature Setting: Don’t rush the setting process by refrigerating; it can alter the texture.
- Flavor Variations: Experiment with extracts like peppermint, almond, or even fruit purées to create unique flavors.
- Add Color: Swirl in natural food coloring for festive marshmallows.
- Storage: Keep your marshmallows in an airtight container at room temperature for up to two weeks.
Creative Ways to Enjoy Homemade Marshmallows
Homemade marshmallows are incredibly versatile and can be enjoyed in countless ways. Here are some ideas:
1. Hot Chocolate Topping
Add a few marshmallows to your favorite hot chocolate for a decadent treat. Their fluffiness and sweetness perfectly complement a warm drink.
2. Dessert Enhancer
Pair marshmallows with recipes like chocolate-covered banana bites or chocolate avocado brownies for an elevated dessert experience.
3. S’mores
Toast your marshmallows over a campfire and sandwich them between graham crackers and chocolate.
4. Festive Gifts
Package your marshmallows in decorative bags and give them as thoughtful gifts for holidays, birthdays, or special occasions.
5. Add to Crumbles
Mix marshmallows into desserts like blueberry crumble bars for an extra layer of gooey texture and sweetness.
FAQs
Can I Make These Marshmallows Paleo-Friendly?
Yes! Substitute the granulated sugar with maple syrup or honey and use arrowroot powder instead of cornstarch for dusting. This will yield soft, paleo marshmallows that fit your dietary preferences.
What’s the Best Way to Store Homemade Marshmallows?
Store marshmallows in an airtight container at room temperature. If you’ve coated them properly, they won’t stick together.
Can I Freeze Homemade Marshmallows?
Yes, but freezing can alter their texture. If you must, store them in an airtight container and separate layers with parchment paper.
How Can I Add a Twist to the Recipe?
Try adding cocoa powder to the marshmallow base for a chocolate flavor, or swirl in fruit purées for a fruity twist.
Why Homemade Marshmallows Stand Out
Homemade marshmallows are not just about the taste—they’re about the experience of creating something from scratch that feels luxurious and indulgent. By crafting your own marshmallows, you’re also opening the door to endless flavor possibilities and the chance to customize a classic treat for any occasion.
Conclusion
Learning how to make homemade marshmallows is not only satisfying but also allows you to create a healthier, more flavorful version of a beloved treat. Whether you’re preparing them for school desserts, experimenting with paleo marshmallows, or enhancing recipes like chocolate avocado brownies and blueberry crumble bars, this step-by-step guide will ensure you achieve marshmallow perfection every time.
Get creative with your flavors, and enjoy the process of making marshmallows in your kitchen playground. Happy marshmallow-making!


