If you’re a fan of mochi, the delightful Japanese dessert made from sticky rice, you’re in for a treat with this chocolate twist! Mochi is a beloved dessert that’s adored for its chewy texture and versatility, and by adding chocolate to the mix, you’re taking it to a whole new level of indulgence. This Chocolate Mochi Recipe is simple, and best of all, it’s a great DIY project that anyone can try at home. With the use of condensed milk for extra sweetness and creaminess, you’ll find this easy-to-make chocolate mochi to be a fun and rewarding dessert to whip up for any occasion.
What Is Mochi?
Before diving into the recipe, let’s first understand what mochi is. Mochi is a traditional Japanese dessert made from glutinous rice that is pounded into a smooth, sticky dough. The texture is elastic and chewy, making it a unique treat compared to other sweets. Mochi is usually served in various forms—sometimes plain, with fillings like red bean paste, or as a topping for desserts like daifuku (mochi with filling) or mochi ice cream.
In Japan, mochi is a staple during celebrations like the New Year, and it can be found in many forms at various food stalls and markets. In recent years, its popularity has grown internationally, and many people enjoy experimenting with different flavors and fillings. This recipe takes the classic mochi and adds a rich chocolate twist that will leave you craving more.
Ingredients for Chocolate Mochi
To make chocolate mochi at home, you’ll need just a few simple ingredients. Many of these are pantry staples, but some may be new to you, such as glutinous rice flour (also known as mochiko). Below is the list of ingredients you’ll need to make this delicious treat:
For the Mochi Dough:
- 1 cup glutinous rice flour (mochiko)
- 1/4 cup cocoa powder (for a rich chocolate flavor)
- 1/2 cup sugar
- 1/4 cup condensed milk (for extra sweetness and creaminess)
- 3/4 cup water
- 1 tablespoon cornstarch (to prevent sticking)
For the Filling:
- 1/2 cup chocolate chips (or finely chopped chocolate)
- 2 tablespoons heavy cream (optional, for a smoother filling)

Step-by-Step Guide to Making Chocolate Mochi
Making mochi from scratch might seem intimidating, but it’s much easier than it looks! This step-by-step guide will walk you through the entire process, ensuring you get the perfect batch of chocolate-filled mochi every time.
Step 1: Prepare the Mochi Dough
Start by preparing the mochi dough. In a medium mixing bowl, combine the glutinous rice flour, cocoa powder, and sugar. Mix them thoroughly so that the cocoa powder and sugar are evenly distributed throughout the rice flour. This dry mixture will form the base of your chocolate mochi dough.
Once the dry ingredients are mixed, add the condensed milk and water to the bowl. Stir the mixture until it becomes smooth and free of lumps. You’ll notice that the dough will be thick, but still pourable. This consistency is what you’re looking for.
Step 2: Steam the Mochi Dough
Next, it’s time to cook the dough. You’ll need a steamer for this process, as steaming helps create the soft, chewy texture that mochi is famous for. If you don’t have a steamer, you can improvise by placing the bowl over a pot of boiling water, ensuring it’s covered.
Pour the mochi dough into a heatproof bowl or a dish that fits comfortably into your steamer. Steam the dough for about 20 to 30 minutes over medium heat. The dough will thicken and turn into a smooth, sticky consistency. Stir it occasionally to ensure it cooks evenly. Once the dough is cooked, remove it from the steamer and let it cool slightly before handling.
Step 3: Prepare the Chocolate Filling
While the mochi dough is cooling, it’s time to prepare the chocolate filling. In a small heatproof bowl, melt the chocolate chips with the heavy cream (if using). You can do this by microwaving the mixture in 20-second intervals, stirring in between, or by using a double boiler method on the stove.
Stir the chocolate and cream until smooth and creamy. Once the filling is ready, set it aside to cool slightly. This chocolate mixture will be the indulgent surprise inside each bite of your mochi.
Step 4: Shape the Mochi
Now that both the mochi dough and chocolate filling are ready, it’s time to shape the mochi. Dust a clean surface with cornstarch to prevent the dough from sticking. Turn the mochi dough out onto the surface and flatten it into a large sheet, using your hands or a rolling pin.
Once the dough is flattened, use a round cookie cutter or your hands to divide it into small portions, about 1 to 1.5 inches in diameter. If you don’t have a cookie cutter, simply tear off pieces of dough and shape them by hand.
Step 5: Fill the Mochi
Take each round piece of dough and gently flatten it into a small disk. Spoon a small amount of the chocolate filling into the center of each disk. Be careful not to overfill, as this could cause the dough to tear.
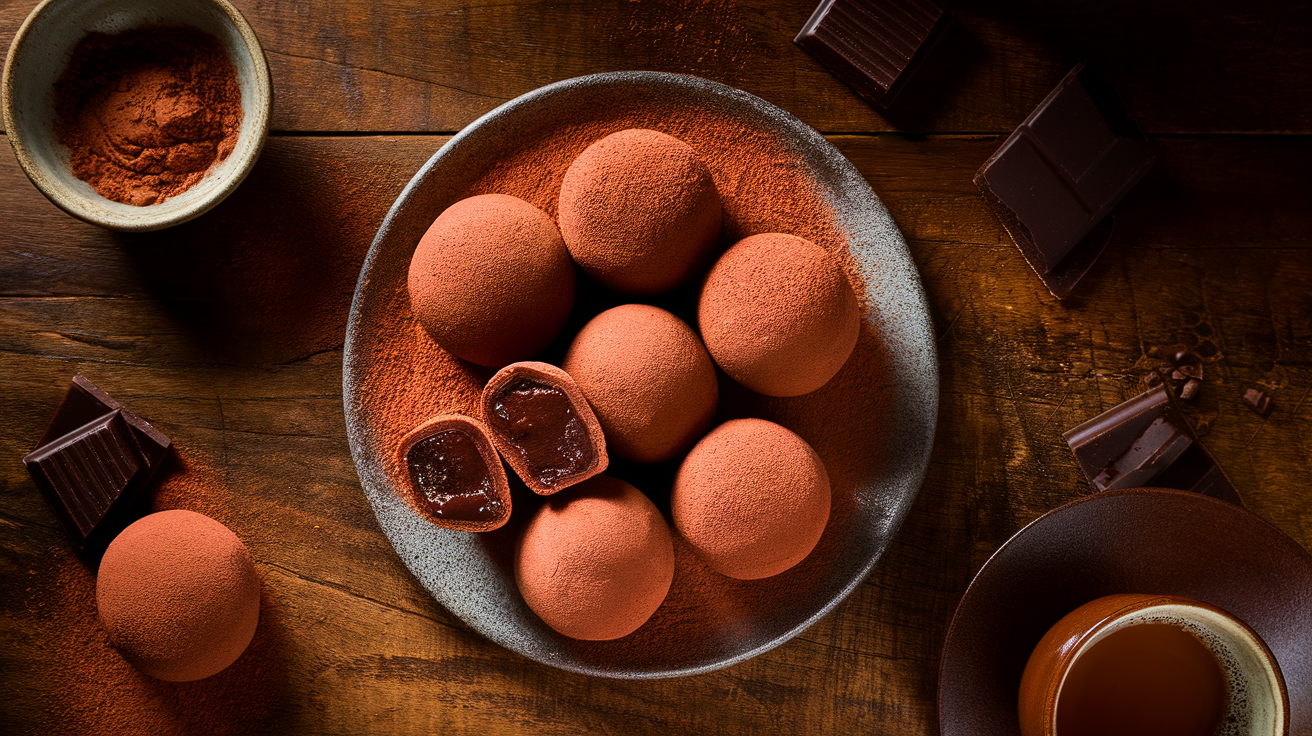
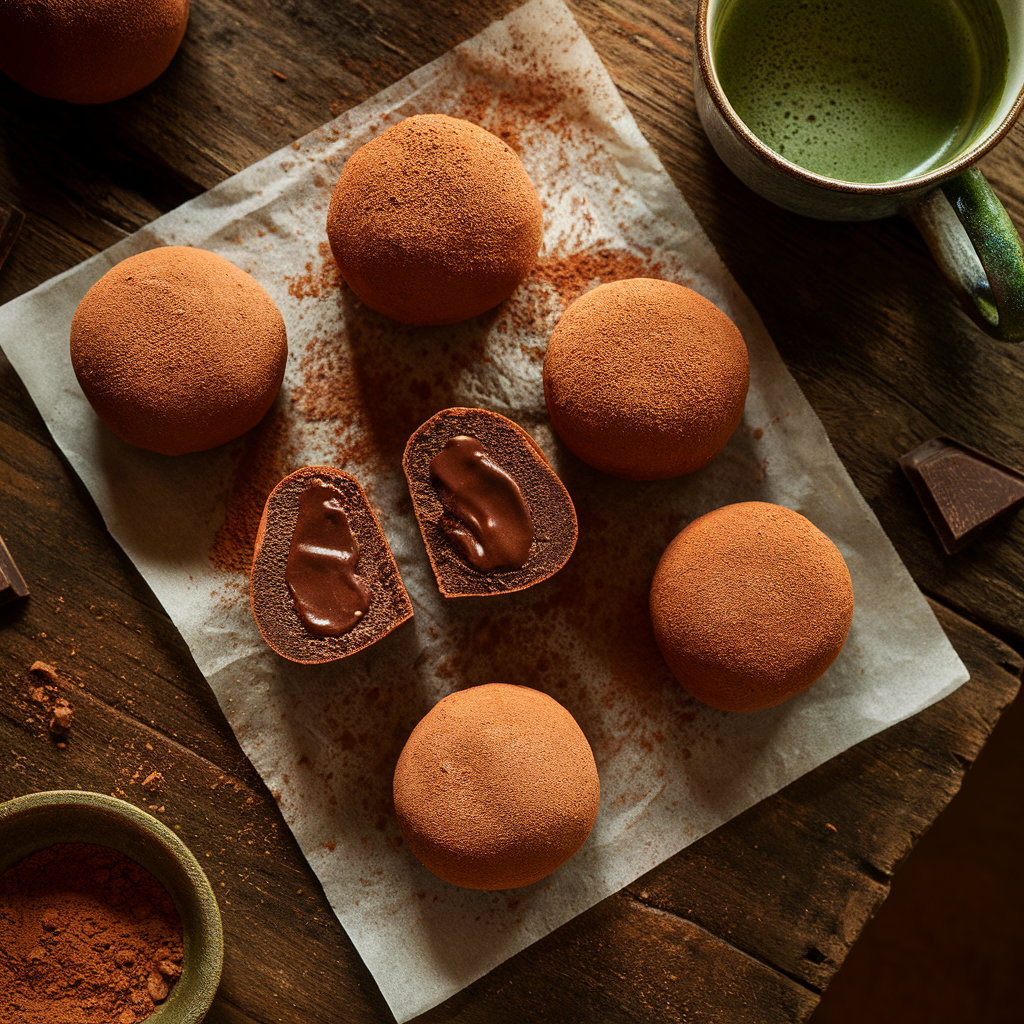
Carefully fold the dough around the chocolate filling to seal it inside. You want to form a neat ball, with the filling completely enclosed in the dough. If you notice any cracks, pinch the dough together to seal it completely.
Step 6: Coat the Mochi
Once you’ve shaped all the chocolate-filled mochi, dust them lightly with cornstarch. This will prevent them from sticking together and will help make them easier to handle. You can also use a little powdered sugar instead of cornstarch for an added touch of sweetness.
Step 7: Serve and Enjoy
Your chocolate mochi is now ready to serve! These chewy, chocolate-filled treats can be enjoyed immediately after making them, or you can store them in the fridge for a few hours to let them firm up a bit. If you store them in the fridge, let them sit at room temperature for a few minutes before serving, as the mochi tends to firm up when chilled.
Why You’ll Love This Chocolate Mochi Recipe
This Chocolate Mochi Recipe is incredibly easy to make, thanks to the use of simple ingredients like condensed milk and glutinous rice flour. The addition of cocoa powder gives it a deep chocolate flavor, while the condensed milk adds sweetness and creaminess. With a gooey chocolate filling inside, this recipe is a twist on the classic mochi that’s sure to satisfy your sweet tooth.
Easy Mochi Recipes: If you’re looking for more easy mochi recipes, this one is a great starting point. With minimal effort, you can create a batch of delicious, chewy chocolate-filled mochis that will impress anyone who tries them.
Mochi Making for Beginners: For beginners, mochi making can seem a bit intimidating, but this recipe simplifies the process. By following step-by-step instructions, you’ll be able to create beautiful homemade mochi that tastes just as good as those from a bakery. Plus, the addition of chocolate elevates the flavor to something truly indulgent.
DIY Mochi: This chocolate mochi recipe is a perfect DIY project. Making mochi from scratch is a fun and rewarding experience, and the end result is a delicious treat that can be enjoyed by friends and family. Whether you’re making mochi for a special occasion or simply as a fun dessert, DIY mochi is always a hit.
Homemade Mochi Recipe with Condensed Milk: Condensed milk is the secret ingredient that gives this chocolate mochi a rich, creamy texture. It’s a great way to bring sweetness to your dough without the need for extra sugar. Condensed milk also helps to make the mochi more elastic, giving it that perfect chewy texture.

Tips for Making Perfect Chocolate Mochi
- Glutinous Rice Flour (Mochiko): Make sure to use glutinous rice flour, also known as mochiko, for the best texture. This type of flour is key to achieving the chewy consistency that mochi is known for.
- Steaming the Dough: Steaming the dough is crucial to getting the right consistency. Don’t try to cook the dough in a regular pot as it won’t achieve the same smooth, sticky texture. A steamer is your best friend for this recipe.
- Filling Options: While chocolate is delicious, you can experiment with other fillings as well. For example, you could try matcha (green tea), red bean paste, or even fruit fillings like strawberry or mango.
- Cornstarch: Cornstarch helps prevent the mochi from sticking together and to your hands. Be generous when dusting your work surface and the mochi before serving.
- Armazenamento: Mochi is best enjoyed fresh, but it can be stored in an airtight container in the fridge for up to 2-3 days. Let it come to room temperature before serving for the best texture.
Mochi Variations to Try
If you want to get creative with your mochi, there are endless variations you can try. Here are a few ideas to change up the flavors:
- Matcha Mochi: Replace the cocoa powder with matcha powder to create a green tea-flavored mochi that pairs beautifully with sweet red bean paste.
- Strawberry Mochi: Fill your mochi with fresh strawberry pieces or strawberry jam for a fruity and sweet twist on the classic mochi.
- Mango Mochi: Use mango puree or small chunks of fresh mango for a tropical flavor that’s perfect for the summer months.
- Peanut Butter Mochi: Add a dollop of peanut butter inside the dough for a creamy, nutty filling that pairs wonderfully with the chewy mochi.
Conclusão
This Chocolate Mochi Recipe is an easy and fun way to make delicious Japanese-inspired treats at home. With its chewy texture, rich chocolate filling, and creamy condensed milk dough, it’s the perfect sweet snack for any occasion. Whether you’re looking for an easy mochi recipe or a fun DIY project, this chocolate mochi is a guaranteed hit.
Mochi making doesn’t have to be complicated, and with this easy recipe, you can impress friends and family with your homemade treats. So grab your glutinous rice flour, some chocolate, and get started on making your very own batch of chocolate mochi. Enjoy the delightful chewiness and satisfy your sweet cravings with this irresistible homemade chocolate treat.